Self Portraiture (Part 2)
- May 8, 2021
- 1 min read
I wanted to recreate one of my grandfather's portraits in the studio, from when he was in his 20s.

I booked studio time with Sam Chick to get another portrait done, and I think it went really well. We had previously sketched out what we thought the lighting setup was (you can read about that here), so it wasn't too hard to get started. However, we did end up adding an extra light after adjusting the lights for a while with a stand-in model. Here's what the lighting setup looked like:


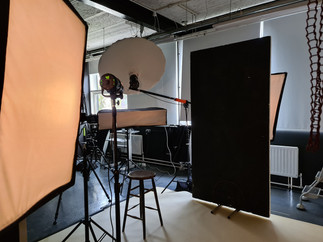
These shots show the progress we made with a stand-in, how that helped when it came to taking photos of me:

Once I was happy with everything, and we had replaced Sam holding a flash with an actual light, I got in front of the camera. I had to adjust my position quite a lot until it was finally right, as well as having to push my hair back to get the back key light to hit the side of my face properly. I went on Photoshop and made some edits, including smoothing out the background, hiding flyaway hairs, changing it to greyscale, cropping the image, and fixing my skin. Here's the before and after:


Here's how I edited it:

Next, I plan to use this to make a contact print in the darkroom so it feels more authentic and similar to the original photo I was working from, as the digital photo doesn't have the same quality or feel as the print.


Comments